Gorgeous Compost in 6 Weeks
This method turns paper, food scraps, and yard waste into quality compost in no time flat!

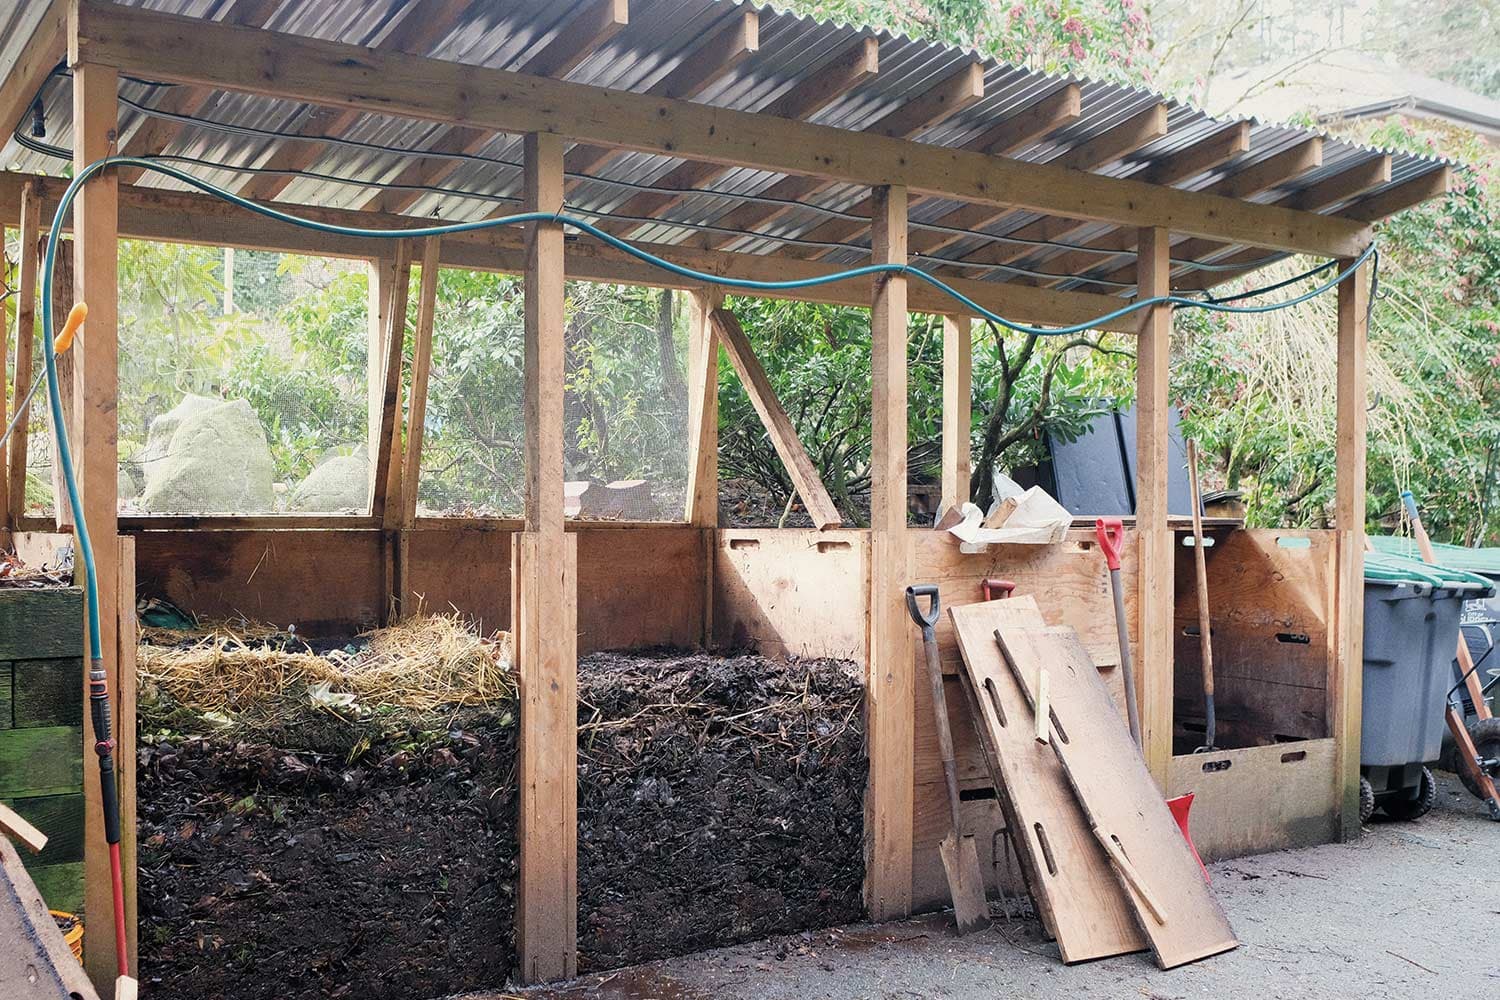
These metre-high compost piles can get as hot as 65°C!
I first fell in love with gardening almost a decade ago, and in the past five years I’ve found the secret to larger and larger harvests: composting. (I’m so passionate about creating rich gardening soil, I even started my own worm casting business in 2020.)
To create your own beautiful, dark compost, all you need is four ingredients: moisture, oxygen, nitrogen-rich material (like kitchen scraps, coffee grounds, manure), and carbon-rich material (including leaves, wood chips, and paper products like this magazine, newspaper, and cardboard boxes). If you left these materials in a pile or a raised tumbler, microorganisms would decompose them into usable compost over 18 months. But with a little effort, you can actually make finished compost in only six weeks!

How is that possible? The answer is hot composting. Here are instructions you can follow to use this method at home:
Outline a large square: Size matters when it comes to hot composting, you’ll ultimately need to build a pile that fills at least 1 cubic metre. Use wood, sticks, or rope to mark out a square in your yard that’s at least 1 m on each side. You will need a space of the same size next to your square for Step 6, so make sure this first square isn’t hemmed in.
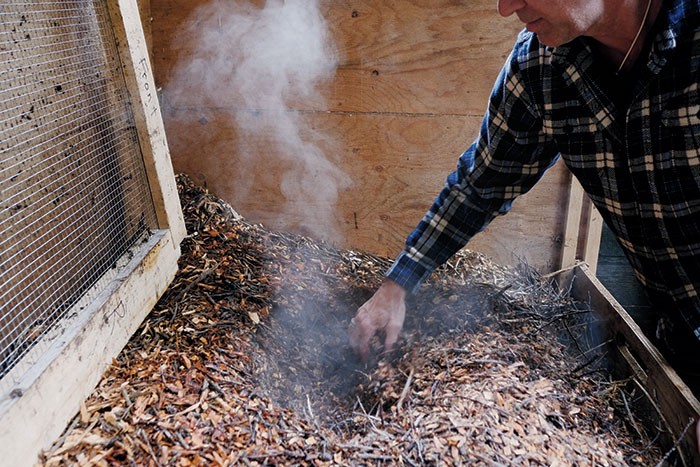
A puff of steam rises from the wood chips used to feed the author’s father’s hot compost pile.
Collect the materials: The bulk of your pile will be made up of nitrogen- and carbon-rich materials. For nitrogen, collect yard waste, kitchen scraps (but no meat or dairy), coffee grounds, and animal manure. For the carbon, collect leaves, woodchips, cardboard, and paper. It’s best to exclude paper that’s been bleached with chlorine, or printed with mineral inks. Asparagus would work because it uses vegetable ink on chlorine-free paper, which is also typically the case with newsprint. But leave out glossy magazines or office paper unless you know their history. Different materials have different concentrations of carbon and nitrogen, so the easiest way to achieve balance in your compost pile is to include a variety of materials in each category. You’ll want about 10 wheelbarrows-full of each.
Mulch it up: Once you’ve collected your materials, break them into pieces 2 cm or smaller. You can use a lawn mower for the leaves, and a hedge trimmer for garden waste. For paper products, tearing by hand and shredding are both good options. Mulching significantly increases the surface area available to the microbes who will break everything down.
Layer and water: In your square, lay down a 15 cm deep layer of carbon-rich materials, and then spray that layer with a hose for 10 seconds. (You can mix the different materials of each category together, or use leaves for one layer, paper for another, etc.) Next, add a 15 cm layer of nitrogen-rich materials on top. Water the nitrogen layer for 10 seconds as well. Repeat this process, alternating carbon and nitrogen layers (and watering), until the pile is 1 m high.
Cover your pile: Once the pile has reached 1 m, cover it with a tarp. This will keep heat in and rain out — too much moisture would deprive the microbes of oxygen. Over the coming days, the microorganisms in the pile will begin eating away at your materials. That creates warmth, which accelerates the process by encouraging microbial reproduction and speeding up decomposition. The pile will begin to heat up, potentially reaching temperatures as hot as 65℃!
Flip the pile: After five or six days have passed, the pile will begin to cool because the microbes inside will have run out of oxygen. To solve this problem, shovel the pile onto the square metre space beside it. This “flipping” process introduces new oxygen, and the microbes will quickly get back to work to finish off the job. You’ll want to flip the pile back after another six days.
Cooling: After about 24 days, you’ll notice that you have beautiful, rich, dark compost. At this point, the pile will begin to naturally cool. After a couple weeks of cooling, you can work that compost into your garden beds. Bring on delicious vegetables!

Leafy greens in a hot compost-fed garden bed, growing beautifully.
If you want a visual for any of or all of this process, you can watch my step-by-step video on YouTube.
Print Issue: Spring 2022
Print Title: Composting's So Hot Right Now